Tag Archive for: removal

Radon Facts

Radon is a cancer-causing, radioactive gas.

You can’t see radon. And you can’t smell it or taste it. But it may be a problem in your home.

Radon is estimated to cause many thousands of deaths each year. That’s because when you breathe air containing radon, you can get lung cancer. In fact, the Surgeon General has warned that radon is the second leading cause of lung cancer in the United States today. Only smoking causes more lung cancer deaths. If you smoke and your home has high radon levels, your risk of lung cancer is especially high.

Radon can be found all over the U.S.

Radon comes from the natural (radioactive) breakdown of uranium in soil, rock and water and gets into the air you breathe. Radon can be found all over the U.S. It can get into any type of building — homes, offices, and schools — and result in a high indoor radon level. But you and your family are most likely to get your greatest exposure at home, where you spend most of your time.

You should test for radon.

Testing is the only way to know if you and your family are at risk from radon. EPA and the Surgeon General recommend testing all homes below the third floor for radon. EPA also recommends testing in schools.

Testing is inexpensive and easy — it should only take a few minutes of your time. Millions of Americans have already tested their homes for radon (see Radon Testing).

You can fix a radon problem.

Radon reduction systems work and they are not too costly. Some radon reduction systems can reduce radon levels in your home by up to 99%. Even very high levels can be reduced to acceptable levels.

New homes can be built with radon-resistant features.

Radon-resistant construction techniques can be effective in preventing radon entry. When installed properly and completely, these simple and inexpensive techniques can help reduce indoor radon levels in homes. In addition, installing them at the time of construction makes it easier and less expensive to reduce radon levels further if these passive techniques don’t reduce radon levels to below 4 pCi/L. Every new home should be tested after occupancy, even if it was built radon-resistant. If radon levels are still in excess of 4 pCi/L, the passive system should be activated by having a qualified mitigator install a vent fan. For more explanation of radon resistant construction techniques, refer to EPA publication, Building Radon Out: A Step-by-Step Guide on How to Build Radon-Resistant Homes (PDF) (84 pp., 5.5 M).

Simple Summer Tasks

Whether you’re cooling off indoors or working on your tan, take the time to perform some simple, routine home maintenance. Rising temperatures and sunny days make summer an ideal season for getting work done around the house. You’ll have a safer home if you catch problems and wear-and-tear before they become hazards.

 Keeping Cool Inside

Energy efficiency is a top priority when electricity bills climb as high as the temperatures outside. Hopefully you’ve had your air conditioning system checked in the spring, as repairmen are often busy in the summer and you may have to sweat it out until your appointment.

Ceiling fans provide an energy-efficient way of circulating cool air. Dust them if needed and balance any wobbly blades by tightening loose screws. For additional energy efficiency, check windows and doors for air leaks and seal with weather stripping or caulk as needed. You’re paying for the cool air, so take steps to be sure it’s not escaping outdoors.

Home Exterior Care and Landscaping

Take advantage of the warm weather and wash the outside of your windows and clean the siding. While it might be tempting to use a pressure washer, a garden hose is best to avoid potentially damaging the exterior of your home. Apply a coat of fresh paint if needed, and repair any damaged vinyl or aluminum siding.

Be aware of termites while you’re outside inspecting your home. Termites can easily go undetected until significant damage has been done. Look for telltale signs like flaking wood or mud buildup and tunneling systems in the exterior wood of your home. Professional pest control inspections are recommended if you have any suspicions of possible infestation.

Well-tended landscaping and a trim and tidy house are as welcoming to guests as the smells of a barbeque. Garden beds look their best when mulched and weeded. Summer annuals can be induced to produce more flowers and bloom longer when you deadhead them. Removing spent flowers also prevents the plant from going to seed. Check garden plants, trees, and shrubs for insect infestations. Unhealthy plants should be removed so that others may thrive.

Lush green grass is of course desirable; however, it is not always realistic or water-efficient. Encourage healthy grass growth with regular mowing, but remember: Keeping grass cut longer in the summer months will prevent roots from drying out as quickly.

Grass and plants should be watered in the morning to allow the water to soak through the soil throughout the day in order to completely nourish their root systems. Check to see if your municipality has water conservation restrictions before watering your lawn or garden.

Trees provide shady ambience and should be well cared for to avoid potential damage to your home. Keep their branches pruned and at a safe distance from your home to avoid storm-related damage. Inspect trees for signs of decay, such as cracks or hollowed limbs, and keep branches clear of your home and power lines. Arborists or tree care professionals can assist with the cutting and removal of large or high limbs.

Also, before planting additional trees and shrubs in your yard, take into consideration the plant’s size when mature and whether or not roots might intrude upon underground pipes or paved surfaces such as sidewalks and driveways.

Garage Upkeep

Hazardous materials such as paint and solvents should be disposed of properly. Don’t store heat-sensitive or combustible materials in the garage, as the temperature will be rising throughout the season. Inspect the floor for grease spots from leaking car fluids, and have your car serviced promptly if you find any.

If you have children, instruct them not to go in the garage unaccompanied. Store your hand tools and power tools behind a lock and key. Fertilizers, weed-killers, and pesticides should be stored out of a child’s reach or behind a locked cabinet. You might also consider organic gardening, which employs nontoxic alternatives to these poisonous chemicals.

Driveways And Walkways

Inspect the pavement for cracks and holes, and remedy them. This goes a long way in preventing accidental slips, trips, and falls. It also works to avoid larger repairs or resurfacing in the future. If you see weeds popping up between cracks in the pavement, resist the urge to pull them up. You’ll remove the upper part of the weed, but the root system will remain intact and new growth will return within a few weeks. For a cost-effective and chemical free solution, boil water in a kettle, carefully carry the kettle outside, and pour the water on any weeds to kill them off for the season.


7 Signs of Drainage Issues

colorful gutters on houseYou don’t need to be an inspector to know that puddles in the basement or a lake on the front lawn are signs of drainage trouble. But not all drainage problems are so obvious. Some can be hard to spot unless you know what to look for. Here’s how the pros read seven of the more subtle signs of potential water damage, and why you’ll save big bucks if you tackle these problems now instead of later.

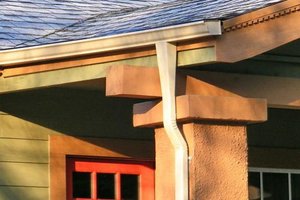
1. Malfunctioning gutters

Rain cascading over the edge of a gutter means that dead leaves and debris are blocking the flow. But that’s not the only sign of malfunctioning gutters. Mud spattered on siding or paint peeling off the house in vertical strips are other indications. If left unchecked, overflowing gutters can rot siding, ruin paint jobs, even cause structural damage.

Best case: Leaves are clogging the downspout, and you just need to clear them out or hire a pro to do it (about $75).

Worst case: Gutters are undersized or improperly pitched and need to be replaced or reinstalled. That could run a few thousand dollars, but it’s still cheaper than new siding.

2. Downspouts that dump

Each inch of rain that falls on 1,000 square feet of a house produces more than 600 gallons of runoff, enough to fill 10 bathtubs to the brim. Dumping that much water too close to the foundation can send it right into the basement, where it can ruin furnishings and flooring and damage mechanical equipment.

Best case: You can add gutter extensions (about $10 for a 10-foot length) to carry the water at least five feet away from the house.

Worst case: The downspouts drop straight down behind large shrubs or other obstacles. An installer may be able to relocate the downspouts (about $150 for each one moved). If not, you’ll need to uproot landscaping to add extensions or underground piping—a sacrifice worth considering if you’ve got water infiltrating the basement.

3. Water stains in the basement

Depending on where the stain appears, you can tell whether the problem is caused by surface water, which can be easy to deal with, or water traveling underground, a more complex situation.

Best case: Stains are high on the foundation wall, indicating that the water is coming (or once came) from an overflowing gutter or surface water directed at the house.

Worst case: The stain extends in a line around the basement, indicating a high-water mark that may recur when heavy rains hit, either because of underground water or because the basement floor lies below the level of municipal storm drains that back up. In that case, an interior drain system and sump pump (around $3,000) are essential for getting the water out if the problem can’t be resolved some other way.

4. Cracks in the foundation

Hairline cracks, as thin as thread, are just cosmetic. Bigger cracks may or may not spell trouble. It depends on the width of the crack, how deep it penetrates, and whether it’s growing.

Best case: A crack appears where the builders finished installing one load of concrete and began pouring the next. Such cracks usually don’t penetrate all the way through. And even if they do, as long as they’re stable you can patch them with hydraulic cement or polyurethane caulk for less than $20.

Worst case: Cracks are continuing to widen, indicating that a drainage problem may be ruining the foundation. Call a structural engineer (not a contractor or waterproofing expert) to diagnose the problem, assess the risk, and suggest a repair.

5. Flaking and deposits on walls

If you see areas of white or gray crust on the basement walls, that’s efflorescence, mineral deposits left behind by evaporating water. Or the wall may be flaking off in big patches, a condition called spalling.

Best case: The efflorescence points to a place where moisture is condensing. It doesn’t cause structural problems, but you may want to scrape off the crust if it looks ugly.

Worst case: The wall is spalling because water is getting inside the masonry. Spalling can be just superficial, but if it’s deep and widespread, it may be a sign of freeze/thaw damage that could progressively weaken the foundation.

6. Mildew in the attic

The attic might seem like a strange place to look for drainage problems, but mildew on the underside of the roof can be a tipoff to serious trouble at the ground level.

Best case: Bathroom fans are spewing hot air directly into the attic, where it condenses on the cold back side of the roof and causes mildew. Venting the fan through an outside wall or the roof (about $200) solves the problem.

Worst case: Moisture from the basement or crawl space is rising through the house and condensing on the underside of the roof. In that case, you’ve got to find and stop the source of the dampness under the house. Then you may have to replace roof sheathing and shingles, a job that runs $6,000 to $9,000 for the typical house.

7. Migrating mulch

When soil doesn’t drain properly, rain may run off in sheets, carving gulleys in the landscape, dumping silt on pathways, and carrying piles of mulch or wood chips where they don’t belong.

Best case: For a few hundred dollars, you can hire a landscaper to create a simple berm (a soil mound) or swale (a wide, shallow ditch) to redirect the water flow away from the house. 

Worst case: You notice the problem when your concrete patio cracks, or paving stones start popping up, because the gravel or sand base material has washed away. After redirecting the water, you’ll need to excavate the patio and start again.

Read more: http://www.houselogic.com/articles/drainage-warning-sides/#ixzz1Ymku9vbH

No Mold is “Good” Mold

One of the biggest questions about Mold is,

“Do I have the bad Mold?”

The answer is, “No Mold is good Mold”.

Mold is, “Toxigenic“, which means it may not always be producing toxins into your environment. However, for no explainable reason the same Mold that was not producing toxins yesterday, may indeed today begin to produce toxic spores. You must remember Mold is a living breathing orginism, best described as half animal and half plant. This is why it has been classified into its own,”Kingdom“, the Kingdom of “Fungi”.
 
Mold does not have to be black to make you sick. Simply the terms “Black Mold”, or “Toxic Mold”, have been sensationalized by the news media, these terms are actually not correct.

Mold Sickness and related illnesses from Mold Exposure are REAL. Mold has been linked to Lung Damage, Brain Damage, Cancer and even Death. The latest discovery of Mold Fine Particulates  in our environment coupled with the associated medical documentation; prove beyond a shadow of a doubt, sickness and disease from mold exposure and exposure to Mold Fine Particulates are very real.

If Mold spores are inhaled or ingested you can become seriously ill. The longer you go undiagnosed, and untreated, the Mold will continue to grow inside your body, making you sicker with each passing day. As Mold continues to grow inside your body it produces poisons called “Mycotoxins”, these poisons leach into your body day after day. Each day it is left untreated the colonies of Mold grow larger producing and releasing larger amounts of toxins into your body.

Different spicies of Mold produce different toxins and people will suffer a wide range of different symptoms. Mold Sickness will affect many people in many different ways and produce a variety of symptoms.

Because the variety of symptoms from mold exposure are so wide in range many physicians deem their patients to have psychological problems.

Below are the symptoms of Mold Sickness.

Level – I Common Symptoms of Mold Exposure
  • Sneezing
  • Itching Skin
  • Redness and skin irritation
  • Watery Eyes
  • Itching Eyes
  • Headache

Level – II Advanced Symptoms of Mold Exposure

The following symptoms of Mold exposure have been reported generally as a result from persons being in a Mold contaminate environment on and off for an extended period of time. Symptoms are reported to have become more severe and longer lasting directly in proportion to the length of exposure time. Their reported symptoms are as follows:
  •  Constant Headaches
  • Nose Bleeds
  • Feelings of Constant Fatigue
  • Breathing Disorders
  • Coughing up Blood or Black looking Debris
  • Nausea
  • Diarrhea
  • Vomiting
  • Loss of Appetite
  • Weight Loss
  • Hair loss
  • Skin Rashes
  • Open Sores on the Skin
  • Memory Loss “Short Term”
  • Neurological & Nervous Disorders
  • Sexual Dysfunction
  • Swollen Glands in the Neck Area and under the Armpit
  • Sudden Asthma Attacks or Breathing Disorders
  • Ear Infections and Pain
  • Chronic Sinus Infections
  • Chronic Bronchitis
  • Pain in the Joints and Muscles

While it seems Mold can cause many symptoms one must remember that there are thousands of species of Mold. Different species of Mold can have a wide variety of reactions within different people.

Level – III Late Stage Symptoms of Mold Exposure


The following Mold exposure symptoms are the most severe and are attributed to high levels of exposure:

  • Blindness
  • Brain Damage
  • Memory Loss “Long term”
  • Bleeding Lungs
  • Cancer
  • Death

 What does all of this mean for you?  It’s simple, Mold can destroy your health, your property, and if not treated correctly the first time, it can grow back and keep destroying your health and your property.


There are many things that need to be addressed when you have Mold. At HIP we strive to educate our clients rather than alarm them.  Knowing what you’re dealing with and how to handle it properly is the first step.  Facts about mold… no hype, just the real life stuff about Mold, identifying it, removing it, and preventing it and protecting your investment.
 

If You Would Like to Speak to Someone About Your Mold Problem,  We Understand and are here to help.  

Contact us today!         


New Study: Diseases caused by Mold Fine Particulates” Mold Fine Particulates” The largest  major medical breakthrough in diseases caused by mold.
Please visit http://www.moldsymptoms.org/ for more details.


Termite Infestation

How Do I Know If My House Is Infested?

Large carton nests in trees, attics, wall voids, etc., are obvious signs of an infestation. Sometimes the damage caused by Formosan subterranean termites is not so obvious. Soft spots, damp or moist patches, bulges, and blistered paint or wallpaper in walls, doors, floors, and other areas may indicate termite activity underneath. Probing these areas with a screwdriver may reveal damaged wood, soil, carton, and live termites. Formosan subterranean termite infestations are recognized by the presence of lots of soldiers.

Subterranean termites crawling above ground build mud shelter tubes because they do not like being exposed in the open to light and air. The tubes keep the termites from drying out and shield them from predators, such as ants, and natural enemies. Shelter tubes are often found on walls coming up from the ground or floor. They may also be found sticking out or dropping down to the ground in crawl spaces, under porches or stairways, etc. Tubes and carton may be in places where they are difficult to see such as stucco or plaster cracks, tree holes, tree crotches, etc. You can break the tubes open to check for termites.

Remember that Formosan subterranean termites swarm during the evening from April through July. Keep in mind that swarmers outside around your home could be emerging and flying in from somewhere else. Check carefully around the premises to see if they are coming from your property.

What Should I Do If I Have Formosan Subterranean Termites?

The best thing to do is to have the infestation professionally treated. There are two types of control available: soil termiticides and baits. The treatment used depends largely on the type and size of the infestation, and which one the homeowner is most comfortable with.

Soil Termiticides

Pre-treatment. Treating soil with a liquid termiticide creates a chemical barrier beneath the structure. Depending on the chemical, the termites will either avoid tunneling through treated soil or die soon after they come in contact with it. Soil termiticides have been the standard preventive treatment for subterranean termites up until the mid-1990s. Termiticides are applied before the foundation slab of a structure is poured. Under ideal conditions, protection should last from 5 to 7 years; but under less than ideal conditions or because of improper application it can be much less. The slightest break in the protective barrier is all that is needed for termites to reach a structure. They can tunnel through areas in the soil where no termiticide is present. Expansion joints, cracks, and utility and plumbing lines are common termite entry points through a concrete slab. Termiticide breakdown, soil erosion, improper application, and careless construction practices (such as leaving wooden grade stakes in the slab or disturbing treated soil) are several ways that the chemical barrier can be broken.

Post-construction treatment. When infestations occur after a structure has been built, termiticides are applied by one of three methods: rodding, drilling, or trenching. In the first, termiticide is injected directly into the soil at specific intervals around the perimeter of the house and beneath the slab with a rodder, an injection tool with a long, hollow, metal rod with an open tip. Drilling involves making holes through concrete slabs, walkways, patios, walls, and floors in order to treat the soil beneath the slab or inside wall voids. Trenching involves digging a shallow trench (about 6 X 6 inches) around the base of the home, applying termiticide to the trench and the backfill and then refilling the trench.

Baits

Baiting systems provide an alternative to liquid termiticides. Developed in the early 1990s, they are also effective against the Formosan subterranean termite. Baiting involves placing bait stations in the soil around the outside of the house. The stations contain small pieces of wood (in some products the stations are installed with both wood and bait) and are checked regularly for termites. When termites are found in a station, the wood is removed and replaced with the bait. The bait is either a paper- or cardboard-like material or textured cellulose that contains a substance that slowly kills the termites. The idea behind baiting is that the termites feed on the bait and get a dose of the active ingredient. Although this does not kill the termites immediately, it gives them enough time to feed the other termites in the colony. Eventually, all the members of the colony are affected. The termites begin dying and the population of the colony is severely reduced or eliminated.

Several different baiting systems are now being used by pest management professionals or are commercially available. Some have insect growth regulators (known as IGRs) as their active ingredient (AI). These are chemical compounds that act like termite hormones and keep the termites from developing normally. Other AIs prevent the termites from getting energy from their food.

Aboveground bait stations are also available and are used when termites are found in walls, doors, posts, flooring, etc. The stations are placed directly on areas where termites are present so that they can begin feeding immediately on the bait.

Advantages of baiting are:

  • It is non-invasive (the baits are odorless and no liquid is involved so the soil remains pesticide-free).
  • Technicians usually do not need to enter the house (unless in-ground stations are needed indoors).
  • Drilling through floors and walls is usually not required.
  • There is no exposure to the active ingredient because it is self-contained within the bait station.
  • Only a small amount of an active ingredient (sometimes less than 1/20 oz.) is used for an entire treatment.
  • The active ingredients are relatively harmless to humans and so little is used it makes it even safer.

The main disadvantage is that control is not immediate. It may take from several months to over a year to rid the home of termites.

How Can I Keep My Home From Being Infested?

There are numerous ways you can reduce the chance of your home being infested by Formosan and other subterranean termites:

  • Remove any wood or cellulose-containing material (such as cardboard) that is in direct contact with bare ground.
  • Carefully inspect wooden items, especially railroad ties, for termites before buying them.
  • Do not leave wooden items such as planters, tubs, trellises, railroad ties, firewood, and stakes on top of or in bare ground.
  • Anchor wooden posts for fences, decks, porches, sheds, etc. in cement so that no wood is contacting bare ground.
  • Structural wood at or near ground level should be pressure-treated with a wood preservative. Preservatives mainly protect against wood-decaying fungi but are also effective against termites.
  • Maintain a zone of at least one foot around the outside of your home that is clear of plants and other landscaping materials. This reduces soil moisture and makes it easier to inspect for shelter tubes coming up from the ground.
  • Install rain gutters to prevent water from dripping down around the perimeter of your home.
  • Keep rain gutters clear so that water drains quickly and does not accumulate and soak the upper walls and roof of your home.
  • Fix or replace leaky outdoor faucets and water lines.
  • Gutter downspouts and air conditioner condensate lines should empty out at least one foot away from the base of the home.
  • The ground next to your home should slope away so that water does not pool next to it.
  • Keep sprinklers from wetting the walls of your home.
  • Fix leaks in the basement, roof, water heater, appliances, and other sources inside your home. These leaks moisten wood and create damp environments that Formosan and other subterranean termites like to live in.
  • Remove all wooden grade stakes, form boards, supports, and scrap wood after finishing construction or remodeling.
  • Remove dead trees and plants including the roots and stumps, if possible, from your yard.
  • Eliminate or reduce the use of mulch and wood chips around the foundation of your home. This eliminates cooler and moist soil conditions favored by Formosan and other subterranean termites.

Intersted in learning more about ways you can improve your property and avoid Insect Infestations?  Call us today!

What is Asbestos and is it Harmful to My Health?

What is Asbestos?  Asbestos is a mineral fiber that, in the past, was added to a variety of products to strengthen them and to provide heat insulation and fire resistance. It can be positively identified only with a special type of microscope.

 Can Asbestos Affect My Health?  From studies, it has been found that breathing high levels of asbestos fibers can lead to an increased risk of:

  • lung cancer;
  • mesothelioma, a cancer of the lining of the chest and the abdominal cavity; and
  • Asbestosis, in which the lungs become scarred with fibrous tissue.

The risk of lung cancer and mesothelioma increases with the number of fibers inhaled. The risk of lung cancer from inhaling asbestos fibers is also greater if you smoke. People who get asbestosis have usually been exposed to high levels of asbestos for a long time. The symptoms of these diseases do not usually appear until about 20 to 30 years after the first exposure to asbestos.

Most people exposed to small amounts of asbestos, as we all are in our daily lives, do not develop these health problems. However, if disturbed, asbestos material may release asbestos fibers, which can be inhaled into the lungs. The fibers can remain there for a long time, increasing the risk of disease. Asbestos material that would crumble easily if handled, or that has been sawed, scraped, or sanded into a powder, is more likely to create a health hazard.

Click here for more information on Inspecting your Home for Asbestos and here for What to Do If You Find Asbestos in your Home.

If, at any time, you are concerned about your home and would like an Asbestos Inspection done by Home Inspection Professionals, please contact us anytime at 1-800-HIP-3200 or click here to Request an Inspection via the web.

Additional information can be found by visiting http://www.epa.gov/asbestos/pubs/ashome.html

Detecting Mold within Your Home

Mold, at times, can be tricky to detect, but, by following a few easy tips, you can often times detect a mold problem without having to call a professional.

How do I tell if I have a mold problem?  The most practical way to find a mold problem is by using your eyes to look for mold growth and by using your nose to locate the source of a suspicious odor. If you see mold or if there is an earthy or musty smell, you should assume a mold problem exists. Other clues are signs of excess moisture or the worsening of allergy-like symptoms.

  • Look for visible mold growth (may appear cottony, velvety, granular, or leathery and have varied colors of white, gray, brown, black, yellow, green). Mold often appears as discoloration, staining, or fuzzy growth on the surface of building materials or furnishings. When mold is visible, testing is not recommended.
  • Search areas with noticeable mold odors.
  • Look for signs of excess moisture or water damage. Look for water leaks, standing water, water stains, condensation problems. For example, do you see any watermarks or discoloration on walls, ceilings, carpet, woodwork or other building materials?
  • Search behind and underneath materials (carpet and pad, wallpaper, vinyl flooring, sink cabinets), furniture, or stored items (especially things placed near outside walls or on cold floors). Sometimes destructive techniques may be needed to inspect and clean enclosed spaces where mold and moisture are hidden; for example, opening up a wall cavity.

Should I test for mold?  No.  It is not recommend that homeowners test for mold themselves. Instead, simply assume there is a problem whenever you see mold or smell mold odors and call a professional. Testing should never take the place of visual inspection and it should never use up resources that are needed to correct moisture problems and remove all visible growth.  Sometimes, mold growth is hidden and difficult to locate. In such cases, a combination of air (outdoor and indoor air samples) and bulk (material) samples may help determine the extent of contamination and where cleaning is needed. However, mold testing is rarely useful for trying to answer questions about health concerns.

Click here for more information about Mold and here for Tips on Mold Clean-Up and Removal.

If, at any time, you are concerned about your home and would like a Mold Inspection done by Home Inspection Professionals, please contact us anytime at 1-800-HIP-3200 or click here to Request an Inspection via the web.

Mold Clean-Up and Removal Tips

It is impossible to get rid of all mold and mold spores indoors; some mold spores will be found floating through the air and in house dust.  Indoor mold growth can and should be prevented or controlled by controlling moisture indoors.  The mold spores will not grow if moisture is not present.  If there is mold growth in your home, just remember that you must clean up the mold and fix the water problem.  If you clean up the mold, but don’t fix the water problem, then, most likely, the mold problem will come back.

How do I clean up the mold?   To clean up and remove indoor mold growth, follow these steps, as they apply to your home.

1.  Identify and Fix the Moisture Problem – the most important step in solving a mold problem is to identify and correct the moisture sources that allowed the growth in the first place. Common indoor moisture sources include:

  • Flooding
  • Condensation (caused by indoor humidity that is too high or surfaces that are too cold)
  • Movement through basement walls and slab
  • Roof leaks
  • Plumbing leaks
  • Overflow from tubs, sinks, or toilets
  • Firewood stored indoors
  • Humidifier use
  • Inadequate venting of kitchen and bath humidity
  • Improper venting of combustion appliances
  • Failure to vent clothes dryer exhaust outdoors (including electric dryers)
  • Line drying laundry indoors
  • House plants – watering them can generate large amounts of moisture

To keep indoor surfaces as dry as possible, try to maintain the home’s relative humidity between 20-40 percent in the winter and less than 60 percent the rest of the year. You can purchase devices to measure relative humidity at some home supply stores. Ventilation, air circulation near cold surfaces, dehumidification, and efforts to minimize the production of moisture in the home are all very important in controlling high humidity that frequently causes mold growth in our cold climate.

2.  Begin Drying All Wet Materialsas soon as possible, begin drying any materials that are wet. For severe moisture problems, use fans and dehumidifiers and move wet items away from walls and off floors. HIP offers services for emergency flood Check with equipment rental companies or restoration firms to see if you can rent fans and dehumidifiers.

  • Run your sump pump. If you don’t have one, it would be helpful to get one now to drain your basement of any leftover water. If your basement has a floor drain, mop all the water to the drain. If your basement does not, mop up the excess water.

  • Turn on a few large fans and a dehumidifier to dry out the basement. Typically this will take at least 24 hours, but you’ll be too busy to notice. It is important to quickly dry your basement to prevent mold, mildew and extra bacteria growth. Bacteria love moist areas. 

3.  Remove and Dispose of Mold Contaminated Materials – items which have absorbed moisture (porous materials) and which have mold growing on them need to be removed, bagged and thrown out. Such materials may include sheet rock, insulation, plaster, carpet/carpet pad, ceiling tiles, wood products (other than solid wood), and paper products. Likewise, any such porous materials that have contacted sewage should also be bagged and thrown away. Non-porous materials with surface mold growth may be saved if they are cleaned well and kept dry.

Take Steps to Protect Yourself – the amount of mold particles in air can increase greatly when mold is disturbed. Consider using protective equipment when handling or working around mold contaminated materials. The following equipment can help minimize exposure to mold:

  •  
    • Rubber gloves
    • Eye goggles
    • Outer clothing (long sleeves and long pants) that can be easily removed in the work area and laundered or discarded
    • Medium-efficiency or high-efficiency filter dust mask (these can be found at safety equipment suppliers, hardware stores, or some other large stores that sell home repair supplies) — at a minimum, use an N-95 or equivalent dust mask
    • Take Steps to Protect Others – plan and perform all work to minimize the amount of dust generated. The following actions can help minimize the spread of mold spores:
      • Enclose all moldy materials in plastic (bags or sheets) before carrying through the home
      • Hang plastic sheeting to separate the work area from the rest of the home
      • Remove outer layer of work clothing in the work area and wash separately or bag
      • Damp clean the entire work area to pick up settled contaminants in dust

Haul up soggy and destroyed belongings while the basement dries. This is the hardest part of a flood cleanup effort. Always lift with your legs because wet boxes and belongings way much more than dry ones.

  • Discard anything that cannot be properly sanitized. Paper products like books, boxes and cards should get thrown away. Anything that can be hosed down with bleach and water, place in your yard or driveway to clean later.
  • Scrub the walls and floors that got wet with a solution made of 1 cup of bleach and 5 gallons of water. Be sure to wear rubber gloves and work clothes.
  • Run the fans and the dehumidifier once again. Again, this could take 24 hours or more. Although the moisture in your basement is now clean moisture, you don’t want it to attract bacteria. Your basement should no longer look or feel moist and humid.
4.  Clean Surfaces – surface mold growing on non-porous materials such as hard plastic, concrete, glass, metal, and solid wood can usually be cleaned. Cleaning must remove and capture the mold contamination, because dead spores and mold particles still cause health problems if they are left in place.
  • Thoroughly scrub all contaminated surfaces using a stiff brush, hot water and a non-ammonia soap/detergent or commercial cleaner
  • Collect excess cleaning liquid with a wet/dry vacuum, mop or sponge
  • Rinse area with clean water and collect excess rinse water

5.  Disinfect Surfaces (if desired) – after cleaning has removed all visible mold and other soiling from contaminated surfaces, a disinfectant may be used to kill mold missed by the cleaning. In the case of sewage contamination, disinfection must be performed. Contact your home inspector for advice.

  • Mix 1/4 to 1/2 cup bleach per gallon of water and apply to surfaces where mold growth was visible before cleaning. The solution can be applied with a spray bottle, garden sprayer, it can be sponged on, or applied by other methods.
  • Collect any run-off of bleach solution with a wet/ dry vacuum, sponge or mop. However, do not rinse or wipe the bleach solution off the areas being treated — allow it to dry on the surface.

Always handle bleach with caution. Never mix bleach with ammonia — toxic chlorine gas may result. Bleach can irritate the eyes, nose, throat, and skin. Provide fresh air (for example, open a window or door). Protect skin and eyes from contact with bleach. Test solution on a small area before treatment, since bleach is very corrosive and may damage some materials.

6.  Remain on Mold Alert – Continue looking for signs of moisture problems or return of mold growth. Be particularly alert to moisture in areas of past growth. If mold returns, repeat cleaning steps and consider using a stronger solution to disinfect the area again. Regrowth may signal that the material should be removed or that moisture is not yet controlled.

When can we rebuild after mold clean-up and removal?  Rebuilding and refurnishing must wait until all affected materials have dried completely. Be patient it takes time to dry out wet building materials. 

Click here for more information about Mold and here for Tips on Detecting Mold.

If, at any time, you are concerned about your home and would like a Mold Inspection done by Home Inspection Professionals, please contact us anytime at 1-800-HIP-3200 or click here to Request an Inspection via the web.